Insert Component
Learn everything there is to know about the Insert Component.
Install the insert base component
Add the component service provider to your config/app.php to ensure the required assets are loaded.
1'providers' => [ 2 3 /* 4 * Laravel Framework Service Providers... 5 */ 6 Illuminate\Auth\AuthServiceProvider::class, 7 8 /* 9 * Package Service Providers...10 */11 WireElements\Pro\Components\Insert\InsertServiceProvider::class,12]
To use the insert component, you must add the insert base component @livewire('insert-pro') to every page of your application where you want to be able to use the
insert—for example, resources/views/layouts/app.blade.php
1<!DOCTYPE html> 2<html> 3<head> 4 <meta charset="utf-8"> 5 <meta name="viewport" content="width=device-width, initial-scale=1"> 6 7 <title>Laravel</title> 8 9 @livewireStyles10</head>11<body>12 13 <!-- Require the Insert Pro component -->14 @livewire('insert-pro')15 16 @livewireScripts17</body>18</html>
Add the @livewire('insert-pro') directive to your layout.
Compile Javascript
This component requires some additional Javascript so ensure this is compiled by requiring the script in your resources/js/bootstrap.js:
1import '../../vendor/wire-elements/pro/resources/js/insert-component.js'To compile you will also need to install the following NPM dependencies:
npm i textarea-caret
It’s also possible to include the required resources directly; see the following next step.
Include Javascript and CSS directly
You can include Javascript and CSS (Bootstrap only) directly by publishing the package assets. If you are using the Boostrap preset, you must include the additional CSS.
1php artisan vendor:publish --tag=wire-elements-pro-assets2 3Copied Directory [/wire-elements-pro/resources/dist] To [/public/vendor/wire-elements-pro]4Publishing complete.Publish package assets.
1<!DOCTYPE html> 2<html> 3<head> 4 <meta charset="utf-8"> 5 <meta name="viewport" content="width=device-width, initial-scale=1"> 6 7 <title>Laravel</title> 8 9 <!-- Include the insert-component.css stylesheet -->10 <link rel="stylesheet" href="{{ asset('vendor/wire-elements-pro/css/bootstrap-insert-component.css') }}">11 12 @livewireStyles13</head>14<body>15 16 <!-- //.... -->17 18 <!-- Include the insert-component.js script -->19 <script src="{{ asset('vendor/wire-elements-pro/js/insert-component.js') }}"></script>20</body>21</html>Make sure to republish assets when you update the package.
Tailwind CSS configuration
If you use Tailwind as your CSS framework, it’s essential to include the Wire Element components in the contents array. Add the following paths to the content array to ensure the required CSS is generated.
1module.exports = {2 3 content: [4 './vendor/wire-elements/pro/config/wire-elements-pro.php',5 './vendor/wire-elements/pro/**/*.blade.php',6 ],7 8 //....9};Configure the tailwind.config.js content array
Chances are you want to make changes to the look and feel of the modal. Publishing the views is one possibility, but staying up to date with any changes will be more time-consuming. For that reason, the Tailwind CSS is in a separate file, so you can make adjustments without the need to edit the blade file. Even if you don't want to make any changes, you must include the CSS like this:
1@import "../../vendor/wire-elements/pro/resources/css/tailwind/insert-component.css"; 2@tailwind base; 3@tailwind components; 4@tailwind utilities; 5 6// Add your customizations here 7 8// Example: Disable the transition animation when reduced motion is enabled 9.wep-modal-content,10.wep-slide-over-container-inner-wrap {11 @apply motion-reduce:transition-none;12}
Add the import statement to your resources/css/app.css
Configuration
If you want to make any configuration changes to the insert component, you will need to publish the config file using the following command:
1php artisan vendor:publish --tag=wire-elements-pro-config2 3Copied File [/wire-elements-pro/config/wire-elements-pro.php] To [/config/wire-elements-pro.php]4Publishing complete.Publish the Wire Elements Pro configuration file
The config file contains the default insert behavior and attributes. The different behaviors and attributes are explained further along in this document.
Using Bootstrap as your front-end framework
If you are using Bootstrap as your front-end framework, you will have to change the preset from Tailwind to Bootstrap:
1return [2 'default' => 'bootstrap',3 4 // ...5];Creating your first insert type
Before you can use the insert component you need to define a InsertType.
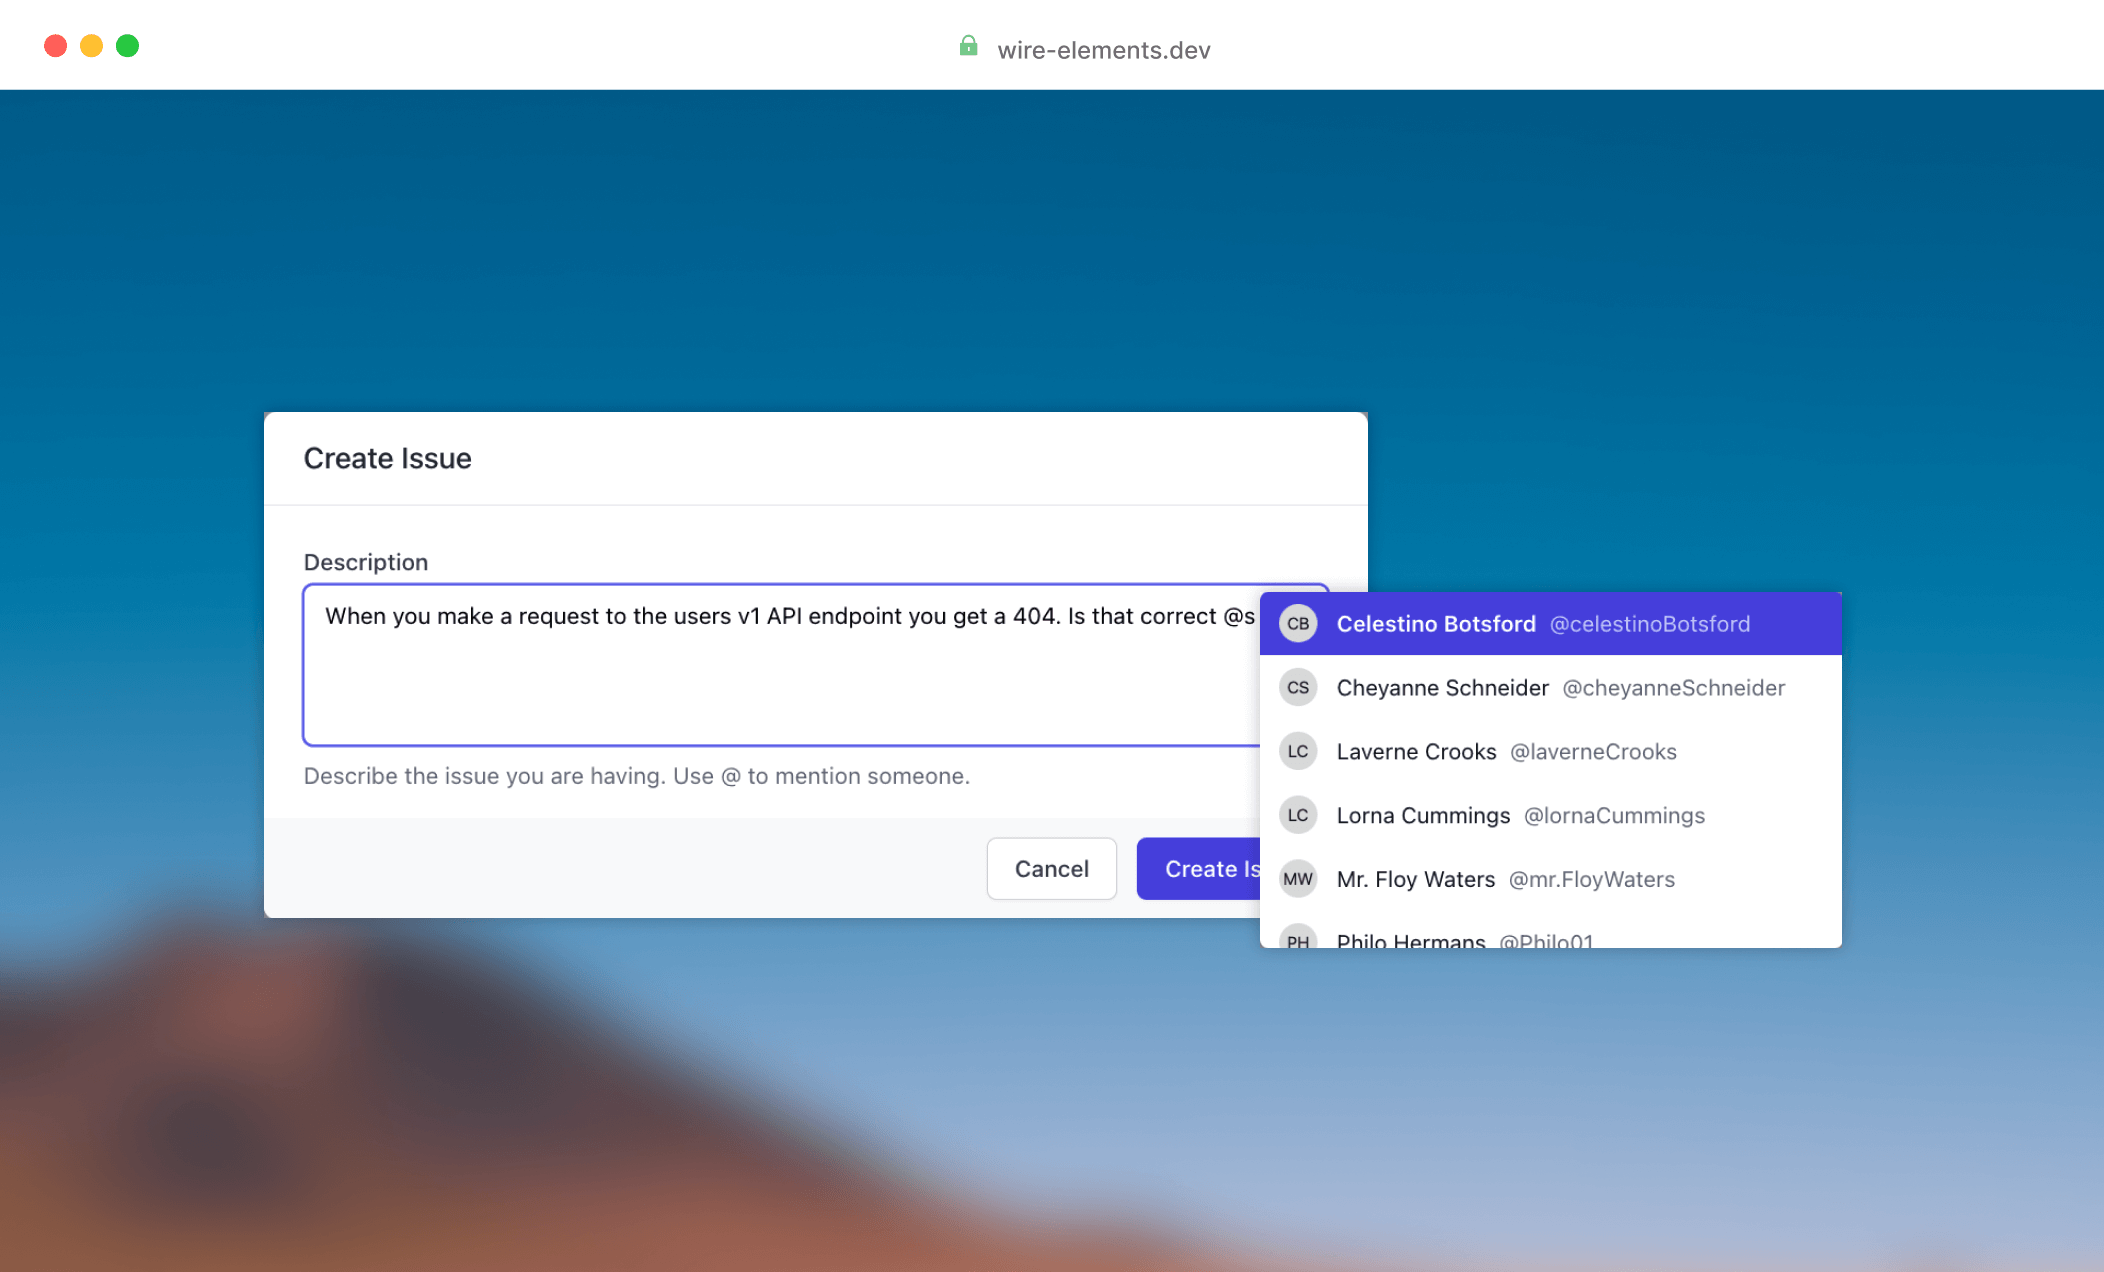
This could be anything you want to be able to mention, for example, a user or ticket just like you see at
GitHub. Or something like a command to help someone insert an image from their media library.
So let's kick off by creating our type, in this example we want to be able to mention different users.
1namespace App\InsertTypes;2 3class UserInsert extends InsertType4{5 protected string $delimiter = '@';6 protected string $match = '\w{1,20}$';7}
Create a new UserInsert class and extend InsertType
The first thing you want to define is delimiter and the match expression that will trigger the mention component if the delimiter matches and the match pattern returns true. The example above looks for words that start with an @ sign followed by one or more characters with a maximum of 20 characters.
Next, we want to define the search method which is responsible for returning the results shown in
the insert component. So in this example we want to return a list of users matching the search query.
1namespace App\InsertTypes; 2 3use App\Models\User; 4use Illuminate\Support\Str; 5use WireElements\Pro\Components\Insert\InsertQueryResult; 6use WireElements\Pro\Components\Insert\InsertQueryResults; 7 8class UserInsert extends InsertType 9{10 protected string $delimiter = '@';11 protected string $match = '\w{1,20}$';12 13 public function search($query): InsertQueryResults14 {15 return InsertQueryResults::make(16 User::query()17 ->where('name', 'like', "%{$query}%")18 ->orWhere('handle', 'like', "%{$query}%")19 ->orderBy('name')20 ->get()21 ->map(function ($user) {22 return InsertQueryResult::make(23 id: $user->id,24 headline: $user->name,25 subheadline: '@' . $user->handle,26 photo: sprintf('https://ui-avatars.com/api/?name=%s', urlencode($user->name)),27 insert: '@' . $user->handle,28 // view: 'different-blade-file',29 );30 }));31 }32}
The search method accepts the query as its parameter. We query the User model and look if there are any names or handles
similar to the query. Finally, we map the results into a InsertQueryResult object. The object
accepts the following properties:
id- Unique identifier for given resultheadline- The headline to be shownsubheadline- The subheadline to be shown (defaults tonulland will be hidden)photo- The photo to be shown (defaults tonulland will be hidden)insert- The string to insert if the user selects given query resultdispatch- Array of events to dispatch if the user chooses a given query resultview- Override the view to use for given query result
If you want to modify the view of one of the query item results you can pass the filename of your Blade template. It's important to use the following Blade component:
1<x-wire-elements-pro::insert-item :item="$result" :index="$loop->index">2 Look at me 😎 I'm a different blade template3</x-wire-elements-pro::insert-item>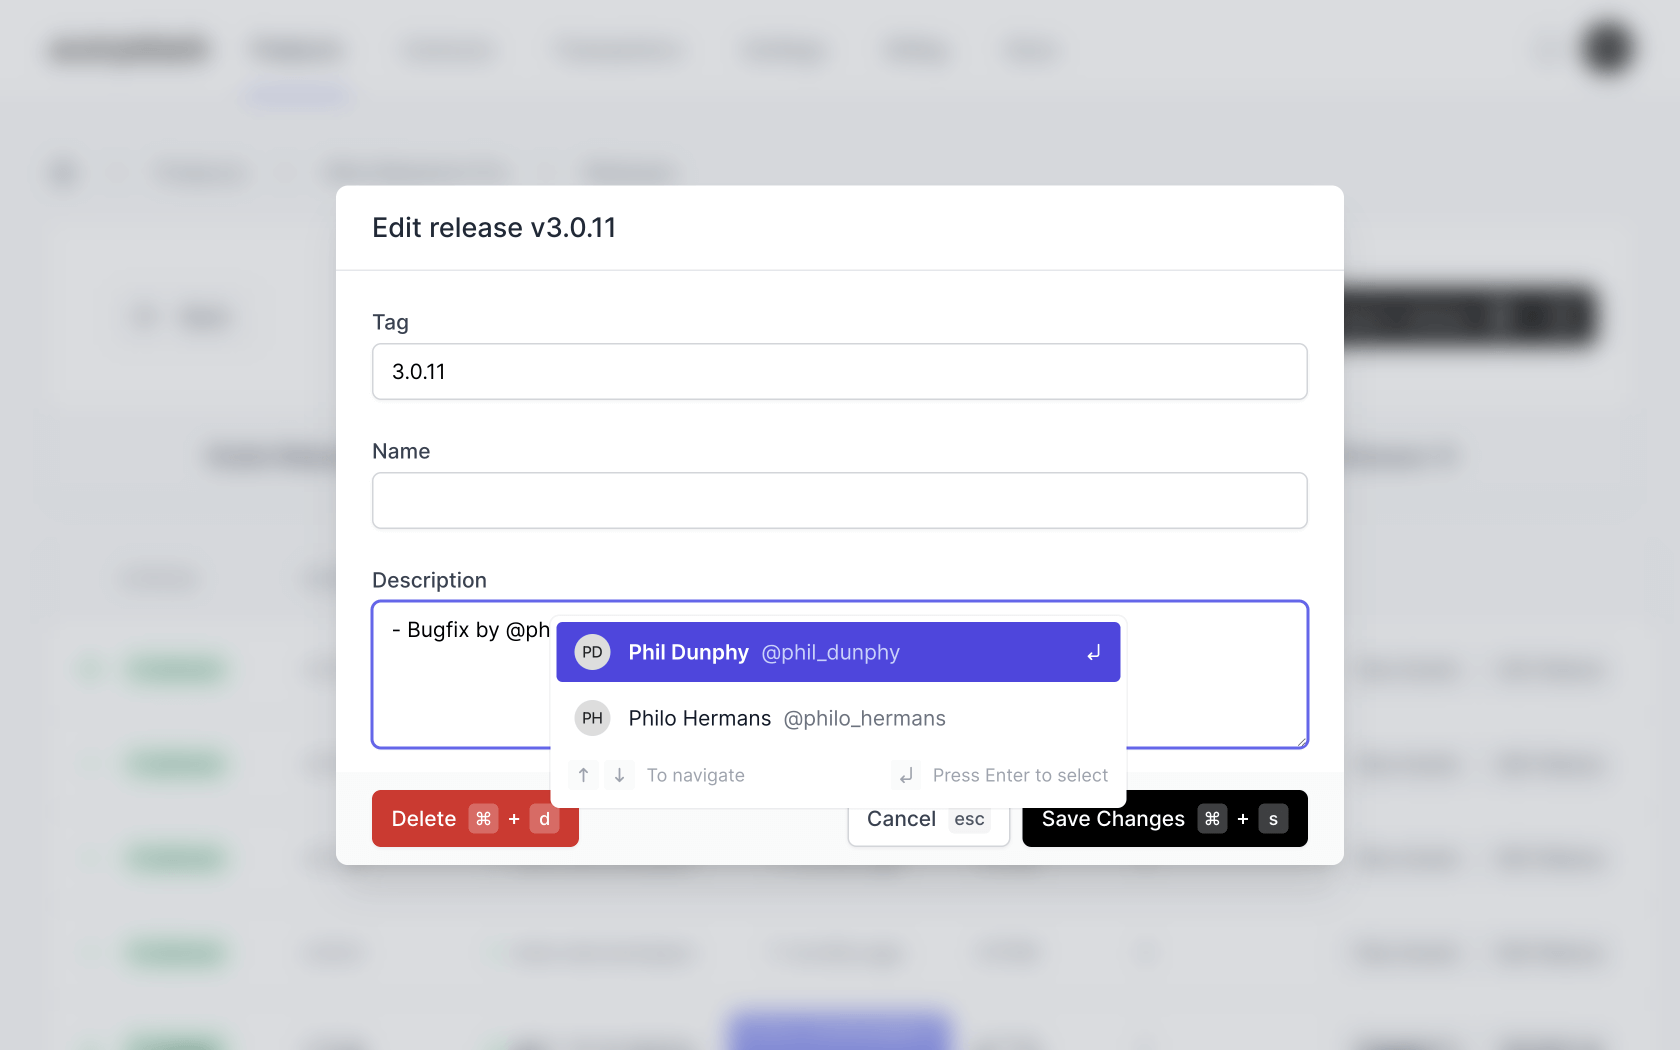 You can use the
 $result variable to access the search query results:
$result['id']$result['headline']$result['subheadline']$result['photo']$result['dispatch']$result['insert']$result['custom_attributes']$result['view']
Enabling the insert component on your input
Before we can mention users we must register the InsertType. To do this you need to add the class to the config/wire-elements-pro.php config file:
1return [ 2 'default' => 'tailwind', 3 'components' => [ 4 'insert' => [ 5 'view' => 'wire-elements-pro::insert.component', 6 'types' => [ 7 'user' => \App\Insert\UserInsert::class, 8 // Examples of a different insert types 9 'ticket' => \App\Insert\TicketInsert::class,10 'command' => \App\Insert\CommandInsert::class,11 ],12 'default-behavior' => [13 'debounce_milliseconds' => 200, // Delay before requesting the query results to prevent requests on every keystroke.14 'show_keyboard_instructions' => true, // Display the keyboard instructions (arrows + enter key)15 ]16 ]17 // Other components18 ]19];
The final step is to enable the insert component on your input. This can be a text input field or a textarea. This component is not tested on WYSIWYG editors and should be considered as not supported at this time.
Add the wep_insert followed by the array key you defined in the config. In our example it's going to be user.
1<input type="text" {{ wep_insert(['user']) }} placeholder="Enter username">2 3<textarea rows="5" @insert(user) placeholder="Description"></textarea>
If you want to enable multiple insert types on a single input field or textarea you can pass multiple types to the wep_insert function:
1<input type="text" {{ wep_insert(['user', 'ticket']) }} placeholder="Enter username">2 3<textarea rows="5" {{ wep_insert(['user', 'ticket']) }} placeholder="Description"></textarea>You can also pass data, this will allow you to scope results, for example, only mention users who are part of the discussion.
1<textarea rows="5" {{ wep_insert(['user'], [1,2,3]) }} placeholder="Description"></textarea> 1class UserInsert extends InsertType 2{ 3 protected string $delimiter = '@'; 4 protected string $match = '\w{1,20}$'; 5 6 public function search($query, $scope): InsertQueryResults 7 { 8 // var_dump($scope) -> [1,2,3] 9 return InsertQueryResults::make(...);10 }11}Creating insert commands
Besides mentioning users you might want to use commands like seen in the interactive demo to, for example, help your user insert an image from the media library or maybe insert a link. Let's take a look at how the Insert class would like like to achieve this:
1class CommandInsert extends InsertType 2{ 3 protected string $delimiter = '/'; 4 protected string $match = '\w*$'; 5 6 public function search($query): InsertQueryResults 7 { 8 return InsertQueryResults::make( 9 // Create a static array with different commands10 collect([11 [12 'name' => 'Insert image',13 'subheadline' => 'Choose from the image library',14 15 // Instead of inserting a value we will dispatch the event to open a slide-over16 'dispatch' => [17 'slide-over.open' => ['media-library'],18 // You can also pass properties, element attributes and behavior19 'slide-over.open' => [20 'some-other-slide-over', // Component21 ['param1' => 'x', 'param2' => 'y'] // Properties !!(this must be a key value array)!!22 ['size' => '6xl'], // Element attributes23 ['close-on-escape' => false, 'trap-focus' => true], // Element behavior24 ],25 ],26 ],27 [28 'name' => 'Insert link',29 'subheadline' => 'Add external link',30 31 // Instead of inserting a value we will dispatch the event to open a slide-over32 'dispatch' => [33 'slide-over.open' => ['link'],34 ],35 ]36 ])37 // We only 'search' if a query string is provided, if the string is empty we want to return all the commands38 // This will ensure the user can see the available commands when they only type the "/" character.39 ->unless(empty($query), fn($q) => $q->filter(fn($command) => str($command['name'])->lower()->contains($query)))40 // Finally, we map the commands into the InsertQueryResult object41 ->map(function ($command, $id) {42 return InsertQueryResult::make(43 id: $id,44 headline: $command['name'],45 dispatch: $command['dispatch'],46 subheadline: $command['subheadline'],47 );48 })49 );50 }51}
Next, let's take a look at how we can use the Link slide-over to insert the link provided by our user.
1<x-wire-elements-pro::tailwind.slide-over on-submit="insert"> 2 <x-slot name="title">Add link</x-slot> 3 4 <div> 5 <div> 6 <label for="title">Title</label> 7 <div class="mt-1"> 8 <input type="text" wire:model.live="title" id="title"> 9 </div>10 11 @error("title")12 <p>{{ $message }}</p>13 @enderror14 </div>15 16 <div>17 <label for="link">Link</label>18 <div class="mt-1">19 <input type="text" wire:model.live="link" id="link">20 </div>21 22 @error("link")23 <p>{{ $message }}</p>24 @enderror25 </div>26 27 <div>28 <button type="button" wire:click="$dispatch('slide-over.close')">29 Cancel30 </button>31 32 <button type="submit">33 Add link34 </button>35 </div>36 </div>37</x-wire-elements-pro::tailwind.slide-over>
The Link slide-over component blade file.
1use WireElements\Pro\Components\Insert\InteractsWithInsertComponent; 2use WireElements\Pro\Components\SlideOver\SlideOver; 3 4class Link extends SlideOver 5{ 6 // Include the trait in order to be able to send values back to your input 7 use InteractsWithInsertComponent; 8 9 public $title;10 public $link;11 12 public $rules = [13 'title' => ['required'],14 'link' => ['required', 'url'],15 ];16 17 public function insert()18 {19 $this->validate();20 21 // Call the insertValue method with the value you want to insert.22 $this->insertValue("[{$this->title}]({$this->link})");23 24 // Be sure to close the slide-over once you've send over the value to insert.25 $this->close();26 }27 28 public function render()29 {30 return view('livewire.link');31 }32}
The Link slide-over component class.
By including the InteractsWithInsertComponent trait we get access to the `insertValue` method. Any
value you give this method will be inserted into the textarea / input field. Please be aware that calling the `insertValue` method only works when the component was opened via the insert component.